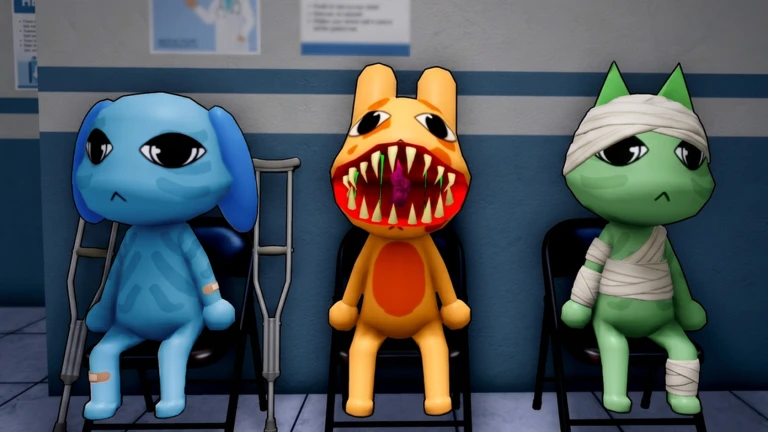
Animal Hospital Characters
Remember a face from a night shift but not where they fit? This roster covers Liz's UV quest and house visit, Dr. Harlow's office escort, Barney, Officer Duckman, Ron, Ratthew's key quest, and the lobby cast, separate from playable Classes and desk patients.
By Bloxron Editorial Team · Last updated
For Barney's choice rewards or Ambulance timing, see Shift Events; for what Dr. Harlow stocks after a shift, see Progression. For desk rejects, use Anomalies. Ratthew's key and the Room 5 cat-poster safe are on his character card below and on Locations. Patients are generated cases, not fixed NPCs.
Animal Hospital characters (NPC list)
| Portrait | Name | Role | Run impact |
|---|---|---|---|
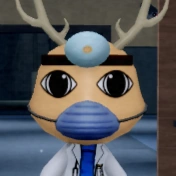 | Dr. Harlow | Hospital doctor / shift authority | Shift results may stock supplies; Ambulance events start with a verbal warning from Harlow. From Shift 7 onward he can idle in the waiting area, talk through his normal lines, then offer Mint Tea ($100 in Supplies Shop) to unlock follow-up questions about Barney, Ron, Ratthew, Liz, and the corporation. Mint Tea also restores Sanity if you drink it yourself. Late run: carry his confidential boxes through NO ACCESS → RESTRICTED → OFFICE, drop on the green mark, then explore. While he sits, hand Ratthew's Key, then the office book, to-do list, and testimony pages (not Room 5's safe). |
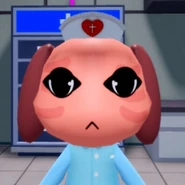 | Shopkeeper Nurse | Supplies Shop clerk | Buy Taser, Run Faster, Chocolate, Teddy Bear, Mint Tea, Scanner, Deployable Camera, and other mid-run gear through her shop row after the Supplies Shop opens. |
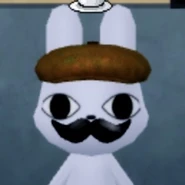 | Barney | Event rabbit / choice storyline | Hide path (or letting the officer timer expire) grants a second Coffee Machine; turn-in triggers a scripted fight with no shop reward. |
| - | Sam | Hazmat helper / recruitable staff | Hire for $250 at check-in; the contract lasts three shifts. He auto-patrols slime, room fires, and Hiders most often. Hider audio while he is hired often means Sam is clearing them, not that you are the target. He ignores Ghosts. He can return after future slime secret shifts if you let the contract expire. |
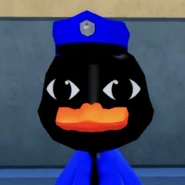 | Officer Duckman | Police officer | Turn-in: Barney stabs Duckman and flees: you may need to stabilize the officer. Hide: Barney rewards a second coffee machine. |
| - | Liz | Journalist / camera quest / home visit | Up to four photo rounds across later shifts: place her camera at the check-in wall (E), shoot only the named patient (yellow highlight plus the sticky note by the camera if you forget), then wait for her next visit. Named targets include Mike Spiders, Sophie Paws, and Rusty Yamada, then a fourth patient on the final round. You do not need to admit the target. Third clear usually pays a Chocolate Bar (+20 Sanity per bite · 3 bites); finish all four for the last Journal beat. A wrong name ends the quest for that run: she reclaims the camera and does not return. Before the fourth shot, keep Taser or Gun ready, the photographed patient can flip into a Mimic. After all four clears, keep surviving until she returns, thanks you, and offers Go to Liz's House (pick that option). Clear one more shift for the apartment cutscene. Full tour: Locations → Liz's home. |
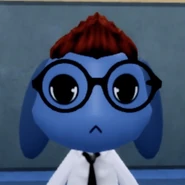 | Ron from Accounting | Accountant / lore hints | He gives dialogue hints only, listen for Bed Monster (Maple Syrup), Ceiling Monster, and don't-stare Stalker warnings. |
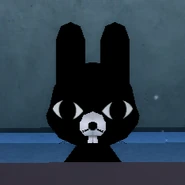 | Ratthew | Story rat / key quest giver | Permanent Ratthew's Key unlocks the cat-poster safe in Room 5, lore reward, not a class or shop unlock. |
 | Lobby Cat | Lobby NPC | Ambient / dialogue |
 | Lobby Bunny | Lobby NPC | Ambient / dialogue |
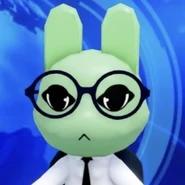 | News Bunny | News-themed lobby NPC | Ambient / dialogue |
| - | Squiggles | Caged clown / Second Floor story beat | Explore the UPPER FLOOR after Ambulance unlock. Pair with Lab Sampler work and new Journal achievement rows rather than treating Squiggles as a hallway threat. |
Authority & shop
Dr. Harlow
Hospital doctor / shift authorityAlso called: Doctor
- Location
- Shift results, Staff Only Room, waiting area, Ambulance prelude, late-run office escort
- Appears
- Between shifts; waiting-area lore from Shift 7+; warns before Ambulance rushes; box escort ~Shift 16-18 (Lore Expansion)
Senior staff who frames the night shift, stocks you between runs, hints at the next night's trouble, and calls out incoming Ambulance pressure before patients bypass the desk. Lore Expansion lets you carry confidential boxes into the NO ACCESS wing and explore his office; Mint Tea waiting-area talk still unlocks follow-up questions from Shift 7+.
Shift results may stock supplies; Ambulance events start with a verbal warning from Harlow. From Shift 7 onward he can idle in the waiting area, talk through his normal lines, then offer Mint Tea ($100 in Supplies Shop) to unlock follow-up questions about Barney, Ron, Ratthew, Liz, and the corporation. Mint Tea also restores Sanity if you drink it yourself. Late run: carry his confidential boxes through NO ACCESS → RESTRICTED → OFFICE, drop on the green mark, then explore. While he sits, hand Ratthew's Key, then the office book, to-do list, and testimony pages (not Room 5's safe).
Full office path and Key hand-ins: Locations → Dr. Harlow's office. Same key also opens Room 5's cat-poster safe.
Related: Progression · Locations · Shift Events · Items
Shopkeeper Nurse
Supplies Shop clerkAlso called: Nurse (NPC)
- Location
- Supplies Shop during a shift
- Appears
- After the mid-shift shop opens (about Shift 3)
Pink nurse model in light blue scrubs at the Supplies Shop: she looks similar to the Nurse class model, but only handles shop purchases.
Buy Taser, Run Faster, Chocolate, Teddy Bear, Mint Tea, Scanner, Deployable Camera, and other mid-run gear through her shop row after the Supplies Shop opens.
Nurse class = player loadout (+1 inventory slot). Shopkeeper Nurse = shop NPC only.
Event cast
Barney
Event rabbit / choice storyline- Location
- Check-in / reception area
- Appears
- Shift 2+; multi-visit arc before the police scene
White rabbit who asks for coffee, favors, and a desk photo across several visits, then Officer Duckman arrives with a wanted poster. Your hide-or-turn-in choice can reward a second coffee machine for the run.
Hide path (or letting the officer timer expire) grants a second Coffee Machine; turn-in triggers a scripted fight with no shop reward.
| Visit | When | Beat |
|---|---|---|
| 1 | Shift 1-3 | Asks for coffee, thanks you for the help |
| 2 | Shift 3-5 | Coffee again; asks you to hold a suitcase marked DON'T OPEN |
| 3 | Shift 5-10 | Coffee + desk camera photo, print may look anomalous; Barney accepts it |
| 4 | ~Shift 12 | Requests a Scalpel from Room 8; leaves with the suitcase |
| 5 | After the arc | Officer Duckman arrives, hide vs turn-in choice |
Not a desk patient during his event, follow the Event UI, not Shutters intake.
Related: Shift Events · Treatments · Items
Sam
Hazmat helper / recruitable staff- Location
- Check-in area after a slime secret shift
- Appears
- After you survive a slime secret shift (often around Shift 12)
Calico cat in a hazmat suit who offers to work for the hospital after Slimebert nights. Former Animal Corp Hazmat, fired for undisclosed reasons: he still wears PPE with his face exposed and patrols with his own gear.
Hire for $250 at check-in; the contract lasts three shifts. He auto-patrols slime, room fires, and Hiders most often. Hider audio while he is hired often means Sam is clearing them, not that you are the target. He ignores Ghosts. He can return after future slime secret shifts if you let the contract expire.
Journal entry unlocks after you meet him. Do not confuse with Lobby Cat. Save shift cash during slime nights if you plan to hire him next.
Related: Shift Events · Anomalies · Threats · Classes
Officer Duckman
Police officerAlso called: Policeman
- Location
- Check-in area during the Barney finale
- Appears
- End of the Barney storyline
Duck officer who shows Barney's wanted photo and asks whether you have seen the suspect. His scene is the branch point for hide vs turn-in.
Turn-in: Barney stabs Duckman and flees: you may need to stabilize the officer. Hide: Barney rewards a second coffee machine.
Related: Shift Events
Story NPCs
Liz
Journalist / camera quest / home visitAlso called: Lisbeth
- Location
- Reception and waiting area during a shift; later her apartment (cutscene)
- Appears
- UV quest from Shift 10 onward (common ~10-18). House invite often after Shift 15 once photos are done (common ~15-20)
Caracal reporter formerly with Animal Corp news. She loans a UV camera mid-shift to document patients tied to the outbreak, not a desk visitor you admit through Shutters. Even More Lore adds a sticky note by the camera with the target name, then a late invite to her apartment outside the hospital.
Up to four photo rounds across later shifts: place her camera at the check-in wall (E), shoot only the named patient (yellow highlight plus the sticky note by the camera if you forget), then wait for her next visit. Named targets include Mike Spiders, Sophie Paws, and Rusty Yamada, then a fourth patient on the final round. You do not need to admit the target. Third clear usually pays a Chocolate Bar (+20 Sanity per bite · 3 bites); finish all four for the last Journal beat. A wrong name ends the quest for that run: she reclaims the camera and does not return. Before the fourth shot, keep Taser or Gun ready, the photographed patient can flip into a Mimic. After all four clears, keep surviving until she returns, thanks you, and offers Go to Liz's House (pick that option). Clear one more shift for the apartment cutscene. Full tour: Locations → Liz's home.
| Visit | When | Beat |
|---|---|---|
| 1 | Photo 1 | Place the UV camera at check-in; shoot the named patient only (sticky note backup) |
| 2 | Photo 2 | Second named patient, story advances |
| 3 | Photo 3 | Third photo clears. Chocolate Bar at check-in (timing can vary) |
| 4 | Photo 4 | Final photo: outbreak lore; photographed patient may become a Mimic, arm up first |
| 5 | House invite (~15+) | After photos clear, she returns: pick Go to Liz's House, finish the shift, then the apartment cutscene |
Keep treating the queue while Liz is active, her event runs alongside normal intake. In public lobbies, name one camera handler and chat the target name so nobody admits them early.
Related: Items · Progression · Updates · Locations · Threats
Ron from Accounting
Accountant / lore hints- Location
- Hospital dialogue scenes (often near reception)
- Appears
- Shift 2 onward, up to seven visits per run
Calm accountant who carries maple syrup and a Top Secret briefcase. His lines hint at infected patients, hidden files, and how to survive ceiling and hallway threats.
He gives dialogue hints only, listen for Bed Monster (Maple Syrup), Ceiling Monster, and don't-stare Stalker warnings.
| Visit | When | Beat |
|---|---|---|
| 1 | First appearance | Intro: wonders why the hospital keeps hiring new staff |
| 2 | Second visit | Surprised you survived; carries maple syrup as monster talisman |
| 3 | Third visit | Claims patients are infected, not sick, hospital is testing something |
| 4 | Fourth visit | Old files moved under a suspicious cleanup |
| 5 | Fifth visit | Ceiling covered in eyes; a doctor petrified and vanished |
| 6 | Sixth visit | Something watches from the corner of your eye, do not stare |
| 7 | Seventh visit | Ratthew chewed classified experiment reports in his office |
June 2026 patch added new Ron lines, wording can shift after updates.
Related: Threats · Shift Events
Ratthew
Story rat / key quest giverAlso called: Ratthew's Key
- Location
- Check-in window · Room 5 safe
- Appears
- Recurring visits across a run (key often drops around Shift 8-10)
Small rat who warns you not to trust anyone, then vanishes after handing over Ratthew's Key: opens a hidden safe in Room 5 tied to Rattina and the Animal Corporation cover-up. Not a Shutter check target.
Permanent Ratthew's Key unlocks the cat-poster safe in Room 5, lore reward, not a class or shop unlock.
| Visit | When | Beat |
|---|---|---|
| 1 | First visit | Wisdom about staying small, hands you paperwork |
| 2 | Second visit | Names himself; calls you a good guy; trust no one |
| 3 | Third visit | Government chase: hints he may need to disappear soon |
| 4 | Later visit | Mentions missing twin sister Rattina and the Animal Corporation |
| 5 | Final visit | Says he must disappear, leaves a note plus Ratthew's Key on the reception counter (stolen from a distracted doctor) |
Ratthew ≠ anomaly. A lookalike queued as a patient is Mimic Patient, see Anomalies. Key route: Characters → Locations Room 5.
Squiggles
Caged clown / Second Floor story beatAlso called: Clown
- Location
- Upper Floor
- Appears
- After Second Floor unlock (first Ambulance or Skip Tutorial)
Clown held upstairs with the Lab and lore rooms. Story and Journal focus for the Second Floor patch, not a desk patient you Shutter at check-in.
Explore the UPPER FLOOR after Ambulance unlock. Pair with Lab Sampler work and new Journal achievement rows rather than treating Squiggles as a hallway threat.
Full Lab loop: Locations → Upper Floor / Lab. Sampler and craft items: Items.
Lobby NPCs
Lobby Cat
Lobby NPC- Location
- Main lobby
- Appears
- Before or between shifts
Lobby cat with ambient dialogue, helps tell lobby NPCs apart from in-shift threats.
Not Black Bunny (hall threat on Threats).
Related: Threats
Lobby Bunny
Lobby NPC- Location
- Main lobby
- Appears
- Before or between shifts
Lobby rabbit with ambient dialogue before you queue a shift.
Not Barney (event) · not Black Bunny (threat).
Related: Shift Events · Threats
News Bunny
News-themed lobby NPC- Location
- Lobby: news or update context
- Appears
- Lobby, before shifts
Lobby rabbit with news-style lines. Before the first Ambulance rush (Shift 4), check the check-in TV, his broadcast often fires right before the wave.
Related: Updates · Shift Events
Patients vs NPCs
Patients are the animal visitors you screen at the desk each shift, generated cases with varied names and symptoms, not a fixed NPC. Use Anomalies for reject flow and Treatments for room care.
FAQ
Are characters playable Classes?
No. Classes like Intern, Doctor, or Nurse are jobs you buy and equip in the lobby Class Shop. Characters on this page are fixed NPCs with dialogue or shop roles.
Doctor class vs Dr. Harlow?
Doctor is a 900 Animal Coin class that restores Sanity when you heal patients. Dr. Harlow is the hospital doctor NPC who appears at shift results and during Ambulance warnings.
Nurse class vs Shopkeeper Nurse?
They share a similar model, but the Nurse class adds inventory slots for your player. Shopkeeper Nurse only runs the Supplies Shop during a shift.
Who is Liz?
Liz (Lisbeth) is a story journalist from Shift 10 onward (often ~10-18, not guaranteed on 10). She loans a UV camera for four named-patient photos (sticky note by the camera shows the name), third clear usually pays a Chocolate Bar; the fourth can flip the patient into a Mimic. A wrong shot ends her quest for that run. After all four clears, a late invite (often ~Shift 15-18) can open her apartment cutscene. She is not a Shutter patient.
Best Barney choice?
Hiding Barney (or letting the officer timer run out) rewards a second Coffee Machine for the run, strong for long Sanity marathons. Turning him in advances the police beat without that reward. Full outcomes live on the Shift Events page.
Is Ratthew an anomaly?
Not an anomaly. Ratthew is a story NPC with a key quest, reject patients on appearance, photo, CCTV, and paperwork. A Ratthew lookalike at intake with no story beat is usually Mimic Patient (see Anomalies), not the real NPC.
How do I get Ratthew's Key?
Let Ratthew reach the window across multiple shifts without letting him die. After he mentions Rattina and says he must disappear, loot the note and Ratthew's Key from the reception counter before you leave the shift.
How do I visit Liz's house?
Finish all four UV photos without a wrong name, keep the run alive into the mid/late teens, then pick Go to Liz's House when she invites you. Clear one more shift for the cutscene. Pizza, her board, and Ratthew's tape are on Locations.
How do I get into Dr. Harlow's office?
Late run (~Shift 16-18): when Harlow stands with confidential boxes, carry them through NO ACCESS by the Supplies Shop into his OFFICE and drop on the green mark. Full path is on Locations. Supplies Shop unlock alone does not open the wing.
What does Ratthew's Key do at Harlow's desk?
After the office escort, give seated Harlow Ratthew's Key to open the secret chat. Then hand him the office book, to-do list, and Oingit testimony pages. Room 5's cat-poster safe is a different Key use. Locations has the table.
Where is the Room 5 safe?
Medical wing: far back on the right. Interact with the cat poster on Room 5's far wall to reveal the safe, then use Ratthew's Key. Full steps are on the Locations page under Room 5.
Who is Squiggles?
The Second Floor clown upstairs near the Lab. Story/Journal beat after the first Ambulance unlocks UPPER FLOOR. Not a Shutters patient at the desk.
How do I use the Lab Sampler?
Take the Sampler from the Lab case, sample a bed patient, finish the sequencer (pink = regular, green = anomaly), then craft a vial from Milk, Ginger, Strange Jelly, and Mushroom. Pink throw; green drink. Steps are on Locations and Items.