Animal Hospital Map
Roblox Animal Hospital map, lobby, check-in hub, Liz's home cutscene, staff rooms, eight patient wings, Room 5's safe, and Dr. Harlow's NO ACCESS office.
By Bloxron Editorial Team · Last updated
The hospital looks simple from the hallway, but each room pulls a different weight during a shift. Use this page to learn where patients wait, where you spawn, and which wings need mini-games before you can hand over meds from Items.
Desk-side anomaly checks happen in the check-in room, see Anomalies for the full reject flow. Room-by-room treatment steps live on Treatments.
Quick overview
| Location | Purpose |
|---|---|
| Lobby | Main waiting area for incoming patients |
| Check-In Room | Player spawn and shift headquarters |
| Staff Only Room | Restricted staff area and shift shop |
| Dr. Harlow's Office | Late-run NO ACCESS escort, lore documents and Key secret |
| Liz's Home | Even More Lore apartment cutscene after her UV quest |
| Upper Floor / Lab | Second Floor stairs, DNA Sampler, serum craft, lore boards |
| Medical Wing (Rooms 1-5) | Standard DNA rooms; oxygen pump mini-game can roll here |
| Emergency Wing (Rooms 6-8) | Advanced rooms with mini-games |
| Room 6. X-Ray | Sequence mini-game and bone scan |
| Room 7. Heart Monitor | Vital check clicking mini-game |
| Room 8. Surgery | Timed emergency surgery mini-game |
Background
The hospital sits along the "Asian Highway", a route tied to Korea, Japan, China, India, and Turkey. Patient chatter hints at myths about the building; the place is known for a creepy, uneasy atmosphere.
People you will see inside include Patients, Dr. Harlow, Nurse (NPC), and Players. NPC profiles live on Characters.
Lobby
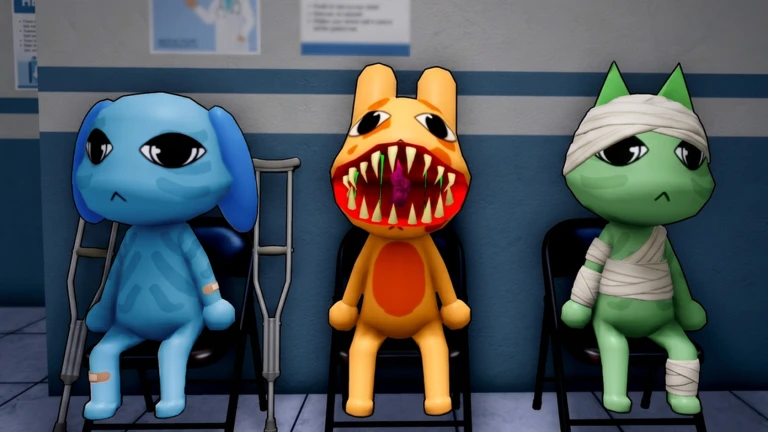
- Three rows of five chairs line the right wall; five chairs sit on the left with plant pots on both ends.
- A large "Animal Hospital" sign hangs over the room with a white medical cross beneath it.
- Corner plant pots and windows on the back and front doors brighten an otherwise unsettling waiting area.
- Lobby Journal (under Classes) logs anomalies, characters, and achievements for Animal Coin rewards.
- Boards next to the shift and patient schedule show your run stats, check them between nights.
- Patients still queue here before the check-in window; most of the shift still happens past the desk.
Check-In Room
- Every shift starts here after the game loads, dark-green carpet with a darker green border.
- A security monitor on a gray desk tracks CCTV status; unlock cameras and shutters on Shift 2.
- Pink sticky note: "Use the cameras to detect anomalies." Yellow note: "They hate photos..."
- Two telephones (gray and black) sit beside the monitor; monitor corners glow green.
Security monitor
| Camera status | Display | Color |
|---|---|---|
| Cameras locked | CAMS OFFLINE | Gray |
| All cameras working | ALL CAMS OPERATIONAL | Light green |
| One camera broken | 1 CAMERA DOWN | Red |
| Multiple cameras broken | X CAMERAS DOWN | Red |
Equipment
| Item | What it does |
|---|---|
| Coffee machine | +5 Sanity per sip, 3 mugs; 180 s cooldown starts when picked up |
| Chocolate Bar | +20 Sanity per bite · 3 bites (~60 total); 29 Robux or Supplies Shop cash |
| Wheelchair rack | Lobby entrance (Even More Lore). Speed buff while hauling fainted patients; return to unequip |
| Taser display | Unlocked Shift 3, shock interior anomalies; recharges in the case |
| Fire Extinguisher case | Unlocked Shift 3, take for free; second case sits right of the Supplies Shop |
| Gun | 99 Robux, 20 ammo. Skin Walker counter |
| Trash bin | Drop unwanted items from hand |
Full tool prices and hallway meds: Items.
Staff Only Room
- Locked to players. Dr. Harlow retreats here at the end of shifts he appears in.
- A shift shop opens here when each night begins and stays open for a limited window.
- Stock randomizes every time the shop opens; worth a stop early when you need extra gear.
Medical Wing
- Medical rooms sit on the right side of the main hallway, numbered 1 through 5.
- Patients get DNA extracted, analyzed, and diagnosed; hallway meds still finish most cases.
- Even More Lore: some Rooms 1-5 patients need an oxygen pumping mini-game when they cannot breathe, not a hallway item (see Treatments).
- Recovery finishes off-screen; hand over hallway stock once tests complete.
Wall posters
| Room | Poster text |
|---|---|
| Room 1 | YOUR HEALTH IS IMPORTANT TO US |
| Room 2 | We trust our professionals |
| Room 5 | Feeling unwell? We are on it. |
Room 5: hidden safe
Medical wing: far back on the right side of the main patient hallway
Requires Ratthew's Key: Ratthew's Key (story reward, not a desk Shutter check)
How to open it
- Finish Ratthew's dialogue arc until he mentions his missing twin sister Rattina and says he has to disappear.
- After his final visit, check the reception counter for a dropped note and Ratthew's Key: grab them before the next shift rolls.
- Walk the main hallway to Room 5 (far right at the back).
- Interact with the cat poster on the far wall to move it aside and reveal the hidden safe.
- Use Ratthew's Key on the safe: it stays in your inventory as a permanent item.
Inside the safe
- A photo of Rattina. Ratthew's twin, formerly with the Animal Corporation
- A suitcase marked Top Secret (matches Ron from Accounting's case style)
- A short note: "The experiment was a success. The shadow now sees everything."
Common mistakes
- Letting Ratthew die during anomaly-heavy shifts, keep him alive through his visits
- Leaving the shift before looting the key from the reception counter
- Searching Room 3 or Room 4, the cat poster is on Room 5's far wall
- Rejecting Ratthew at the window: he is a story NPC, not a patient anomaly
Liz's home (apartment cutscene)
After you clear all four UV photos. She returns later (often around Shift 15-20), thanks you, and offers Go to Liz's House. Finish that shift to trigger the cutscene.
Requires Liz UV quest clear. Liz UV quest finished with no wrong-name fail that run. Sticky note by the camera shows each target name during the photo rounds.
How to unlock
- Complete the four UV photo visits (wrong name ends the quest for that run).
- Keep the run alive until Liz comes back with the house invite.
- Choose Go to Liz's House (first option) when the dialogue appears.
- Clear the current shift; the game loads her apartment cutscene.
Inside the apartment
- Pizza on the table restores about +50 Sanity total; eat slices separately when you need them.
- Her board and clippings cover Animal Corp, patients who get worse after visits, and anomaly timing that looks scheduled.
- Ratthew knocks, confirms he works with Liz, and can play vent footage on the TV (Ron office + Hazmat nearby before they notice).
- A second knock: peephole shows a red-eyed figure in a Secret Agent-like look. Liz tells you to leave; the scene blacks out back to the hospital.
A locked door beside Room 6 near the store still has no known open method. Liz's map marks question-mark spots that may match closed hospital areas later.
Common mistakes
- Failing a UV photo with the wrong name, she takes the camera and the house line will not start that run
- Leaving after the invite without finishing the shift, cutscene waits for shift clear
- Expecting to walk out of the hospital freely, the visit is a cutscene route, not an open outdoor map
Dr. Harlow's office (NO ACCESS wing)
Late run, often around Shift 16 (window ~16-18). Cue beats the number: Harlow in the lobby or entrance with confidential Animal Corp boxes, asking you to carry them.
Requires Dr. Harlow box escort, Supplies Shop side of the hospital already open (normal early unlock ~Shift 3). The NO ACCESS door stays sealed until the box escort starts.
How to get in
- Talk to Harlow and pick up a box (E / interact).
- Follow him to the NO ACCESS door by the Supplies Shop.
- Enter, follow the corridor, turn left to the RESTRICTED door.
- Pass the open area with four bridges / walkways.
- Take the OFFICE door into the waiting area.
- Drop the box on the green-highlighted desk or Materials mark to finish the escort.
Harlow sits inside. Ron from Accounting may walk in complaining about Ratthew, then leave toward his own office (you cannot follow). Explore the office freely after that beat.
Documents inside
| Item | Where | What it shows |
|---|---|---|
| Burnt family photo | Right side of Harlow's main desk | Frame of Harlow, wife, and daughter, burns hide the parents; the daughter's face stays clear. |
| To-do list | Desk behind Harlow's chair | Chores about Ron's shipment, double coffee, "Regards" emails, Wing B recounts, feeding the supply-closet "thing," not calling medicine "the batch," and optional sleep. |
| Locked Anomaly Gene book | Bookshelf right of the desk | On the Discovery and Nature of the "Anomaly Gene" by John Arthur Nomaly, no known open method yet. |
| Redacted congratulatory letter | Book / papers near the to-do desk | Another doctor (name redacted) praises progress, mentions "the boss," and asks him to pay "reception actors" on time. |
| Oingit incident pages | Left of the desk, binders / cardboard box | Ron's interview: a creature pulls former intern Oingit under a bed; the corporation tells them to forget him and hire a new intern. |
| Ron's email | Computer on Harlow's desk | Raw supplies arrive tonight, process them personally and fast; unprocessed materials once looked different by morning. |
Extras
- Sticky note under a desk: "Call 808 for cleanup", flavor only.
- Deer plush Easter egg in the office waiting room (cosmetic find).
Ratthew's Key secret
Office open and Harlow seated: hand him Ratthew's Key (Golden Key) to start the secret chat. Room 5's cat-poster safe uses the same key differently, see Room 5 above.
What to hand him next
| Item | Where | What to do |
|---|---|---|
| Anomaly Gene book | Bookshelf by his desk (same spot as the locked book above) | Pick it up and give it to him: he talks about the author. |
| To-do list | Behind his chair | Hand it over for more of the secret lines. |
| Testimony / Oingit reports | Top of the binder shelf (corner / left of desk) | Give him the pages for the cover-up beat. |
- No key in inventory = no secret start.
- Grab each item in the office, then give it to him while the chat is running.
- Just reading the papers on the desk does not count as handing them over.
Common mistakes
- Trying NO ACCESS before the box cue. Supplies Shop unlock does not open the wing alone
- Leaving the boxes before the green drop mark
- Expecting the locked Anomaly Gene book to open, no known method yet
- Confusing the office escort with the Room 5 safe (both use Ratthew's Key in different ways)
- Talking to seated Harlow with no Golden Key, secret chat never starts
Upper Floor / Lab
Second Floor shipped September 5, 2026 at 16:00 UTC. The upper floor opens after your first Ambulance visit (Skip Tutorial also unlocks it early). Stairs marked UPPER FLOOR sit along the ward corridor near Rooms 6-8. Inside: the Lab, DNA Sampler loop, lore boards, a caged clown, new Journal achievements, and six class skins.
How to unlock
- Clear your first Ambulance rush, then look for the UPPER FLOOR stairs near the Emergency wing (Rooms 6-8)
- Skip Tutorial / Fast Start also opens the floor early if you want Lab practice before mid-run Ambulance nights
- Tutorial desk unlocks stay the same: Shutters and cameras after Shift 1, Taser after Shift 3
Lab loop
The Lab is the main Second Floor room. Grab the Sampler from its case, pull DNA from a bed patient, finish the sequencer mini-game upstairs, then craft a vial from Milk, Ginger, Strange Jelly, and Mushroom. Recipes keep shifting, so check the craft order in your lobby instead of locking an old guide list.
- Take the Sampler from its case in the Lab
- Use it on a patient already in a treatment bed
- Return upstairs and run the sequencer mini-game to land the sample in a dish
- Pink dish = regular patient DNA; green dish = anomaly DNA
- Feed a three-step sequence using Milk, Ginger, Strange Jelly, and/or Mushroom
- Press a Glass Vial after the roughly 30-second timer
- Pink serums are thrown at patients; green serums are drunk
| Item | What it does |
|---|---|
| Sampler | Lab case tool; pulls DNA from bed patients for the sequencer |
| Milk | Lab craft ingredient for serum sequences |
| Ginger | Lab craft ingredient for serum sequences |
| Strange Jelly | Lab craft ingredient for serum sequences |
| Mushroom | Lab craft ingredient for serum sequences |
| Glass Vial | Finish craft after the timer; pink throw / green drink |
Shop prices and Sampler notes also sit on Items. Squiggles is on Characters.
Also upstairs
- A board upstairs lists stackable effects, useful when you experiment with serums
- Extra rooms hold lore boards and investigation props, read them if you chase story Journal entries
- A new hidden location shipped with the floor; exact path is still being pinned down, explore odd corners instead of trusting old map clips
- Weekly leaderboard reset with this patch, climb starts fresh
How do I unlock the second floor?
After the first Ambulance visit, take the UPPER FLOOR stairs near Rooms 6-8. Skip Tutorial also opens it early. Desk unlocks for Shutters, cameras, and Taser do not change.
What do pink and green serums do?
Pink vials are thrown at patients. Green vials are drunk. Exact craft recipes still move between builds, confirm the three-step mix and timer in the Lab before you burn ingredients.
Does Second Floor add codes?
No. The patch did not add a redeem menu. Keep using Journal coins, Class Shop, and shift cash.
Emergency Wing
- Emergency rooms are on the left side of the hospital, next to the office door.
- Rooms 6 through 8 require mini-games before you can finish a case, tougher but more varied.
Room 6. X-Ray
- Watch four colors flash in order, then repeat the sequence with M1.
- One wrong input resets the pattern with a new sequence.
- The patient gets an X-ray scan instead of DNA, scan color matches the last sequence color.
- Diagnoses and hallway treatments work the same as basic rooms once the scan finishes.
- Locked door beside Room 6 near the store: no known open method yet (Even More Lore tease tied to Liz's map).
Room 7. Heart Monitor
- Tap the correct buttons to raise the heart monitor to 100%.
- Heart rate ticks down if you stop clicking; red skull buttons only shave progress: they do not kill the patient.
- Vitals replace DNA analysis; deliver hallway stock like a basic room after the meter maxes out.
Room 8. Surgery
- 45-second timed puzzle, timer starts only after you give an IV Drop.
- Desk tools spawn in random spots each run; match four single-item rounds, then a fifth round asking for three items.
- Exclusive tools here: Organ Transplant, Organ Treatment, Scalpel, Scissors, Antibiotics.
- No standard diagnosis, treatments are randomly assigned throughout the procedure.
Tentacle Mass events and HUD interrupts during surgery: Shift Events and Threats.
Trivia
- Surgery mini-game music is Clinical Trial by Anselm Kreuzer and Andreas Suttner.